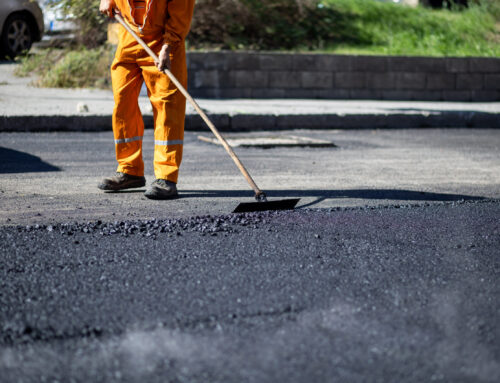
Asphalt, while durable, is prone to wear and tear over time. Cracks in asphalt can form due to weather conditions, traffic loads, or natural aging. If left unattended, these tiny cracks can expand, leading to bigger problems like potholes, structural damage, or water infiltration that accelerates deterioration. Fortunately, repairing cracks in asphalt is a manageable task, so long as it’s done early in the cracking stage. This time on the Sunrise Asphalt blog, we’ll walk you through the asphalt crack repair process to help extend the life of your pavement and maintain its appearance.
Why It’s Important to Repair Asphalt Cracks
Cracks in asphalt may start small, but they can get worse quickly if not addressed. Water can seep into cracks, weakening the base and causing the pavement to erode. In colder climates, water can freeze inside cracks, expanding and causing the cracks to grow larger through freeze-thaw cycles. Over time, this can result in potholes, uneven surfaces, and expensive repairs. So, how do you, a homeowner or business owner, get started without the experience and equipment of a pavement pro?
Step 1: Assess the Condition of the Pavement
Before starting the repair process, inspect the asphalt to determine the cracks’ size, depth, and extent. Some cracks may be superficial and easy to fix, while others could indicate more significant issues. Generally, there are two main types of cracks:
Hairline Cracks: These narrow, shallow cracks are typically less than 1/4 inch wide. They are relatively easy to repair using simple sealants.
Larger Cracks: Cracks that are wider than 1/4 inch or deeper require more extensive repair methods. These may involve filling the crack with asphalt patch material or specialized crack filler.
Identifying the type of cracks you’re dealing with will help you choose the right repair materials and tools for the job, guiding the next steps.
Step 2: Clean the Cracks
The next step in asphalt crack repair is to clean the cracks thoroughly. Dirt, debris, weeds, and loose asphalt can prevent the crack sealant from bonding properly, so it’s important to remove all obstructions, debris, etc. that may have found their way into the crack. You can do this in a few ways.
Use a Wire Brush: Scrub the crack with a wire brush to remove any loose material from the edges of the crack.
Blow Away Debris: After brushing, use an air blower or broom to clear away any remaining dirt, dust, or small stones.
Remove Weeds: If weeds are growing in the cracks, pull them out or use a weed killer to ensure the crack is clear before sealing.
In cases where moisture is present, allow the cracks to dry completely before continuing.
Step 3: Prepare the Crack for Sealing
Once the cracks are clean and dry, you may need to prepare them further, depending on their size and depth.
For Larger Cracks: If you’re dealing with broader or deeper cracks, use a crack chaser or angle grinder to smooth the edges. This helps the sealant adhere better to the asphalt.
For Hairline Cracks: Smaller cracks generally don’t require any additional preparation beyond cleaning.
Additionally, for deeper cracks, you may need to use a backer rod (a foam rope) to fill part of the depth before applying the sealant. This prevents the sealant from sinking too deep into the crack, ensuring a better seal.
Step 4: Apply the Crack Sealant or Filler
After properly cleaning and prepping the cracks, it’s time to apply crack sealant or filler. The type of material you use will depend on the size and type of crack.
For Hairline Cracks: Use a liquid crack sealant. These are typically easy to apply with a pourable bottle or caulking gun. Simply squeeze the sealant into the crack, filling it slightly above the surface to allow for settling.
For larger cracks, Use a rubberized asphalt crack filler. These products are designed to fill wider gaps and provide a flexible, durable seal. Depending on the product, you may need to use a trowel or a specialized applicator to spread the filler evenly across the crack.
As you apply the sealant, ensure it fills the entire crack without air pockets. You may need to smooth the surface with a putty knife for wider cracks to achieve an even finish.
Step 5: Let the Sealant Cure
After applying the sealant, allow it to cure according to the manufacturer’s instructions. This typically takes several hours but may vary depending on the product and weather conditions. During this time, keeping traffic off the pavement is important to prevent the sealant from being disturbed or damaged.
Step 6: Perform Regular Maintenance
Crack sealing is not a one-time fix; it’s part of an ongoing asphalt maintenance strategy. Regularly take a look at your asphalt, especially after extreme weather conditions, will help you identify new cracks or signs of wear before they become major issues. Keep a close eye on high-traffic areas, as these are more likely to experience stress and cracking.
Sealcoating: Applying a sealcoat every 2-3 years can help protect the asphalt surface and prevent cracks from forming in the first place. Sealcoating provides a protective layer against UV rays, moisture, and chemicals.
Reapply Crack Sealant: If the cracks reappear or if you notice new ones forming, be sure to reapply crack sealant as needed to maintain the integrity of the pavement.
Cracks in asphalt are inevitable, but timely repairs can prevent them from becoming costly problems. Following this step-by-step guide to asphalt crack repair, you can maintain a smooth, durable surface that lasts for years.
If any of this seemed a bit beyond your capabilities or your cracks are past the point of no return, well, you’re in luck! Here at Sunrise Asphalt, we are more than happy to help!


