Though it isn’t our specialty, concrete driveway resurfacing is something that we see frequent questions about. To that end, we thought we should at least address it. Keep in mind, we are an asphalt business and we know it like the back of our hands. Many of us know concrete as it pertains to driveways but it isn’t the business of Sunrise Asphalt. With that said, here are the tips to resurfacing a concrete driveway!
Concrete Driveway Resurfacing
There are a number of concrete resurfacing products out there, so what you do depends on the individual mix. For the most part though, it can be achieved in the following steps.
Step 1 – Washing
When it comes to resurfacing, you want to make sure you are starting with a fresh slate. That means washing! Using a pressure washer with a psi of 3,500 (these can be rented) blast the surface clean and eliminate oil, dirt, and flaking concrete patches. Once this has been done, look around for large cracks. These you will want to repair with specific patching compounds before applying the resurfacing product.
Step 2 – Mix
Following the instructions on the individual product, mix your concrete together. Don’t attempt to do this by hand, for one it will absolutely kill your arm, and for two it won’t be an even spreadable mix like you need. Use a power drill with the right attachment (a mixing paddle). If you’re in Arizona like us than it’s important to note the temperature and the workable temps of the mix. In hot weather the mix can harden dramatically quick.
Step 3 – Spread
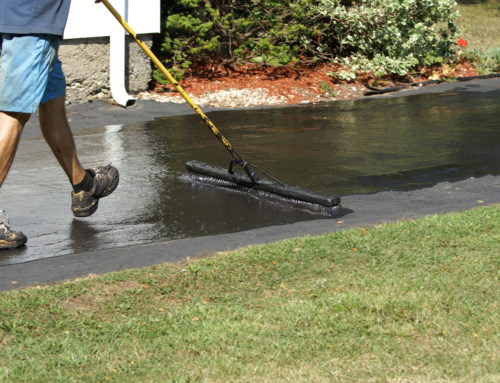
You have your concrete mixed and ready for work, now its time to apply it. As we mentioned if its hot, or the driveway is large, it will be best to work in sections, nothing larger than 12’ x 12’. This will make sure your mix isn’t hardening before you can get it all laid out. Once you have the sections planned, begin pouring out the mix in strips, about a foot in length. Then use a squeegee with a long handle to spread it, working back and forth to ensure the mix is finding its way into all the available spaces.
Tip: If you want to give your new concrete surface a no-slip finish, let it set for a few minutes, then using a concrete broom give it a few sweeps and you’ll have ridges.
That’s it! Your concrete driveway is now looking fresher than ever! Depending on the heat and the mix used you may have a few more steps so pay attention.
Now, is your concrete driveway even worth resurfacing? Or maybe you don’t have a driveway built at all? Here are some reasons we recommend asphalt over concrete.
Asphalt vs Concrete Driveways Pros vs Cons
Asphalt is a better choice for driveway surfaces for a few reasons.
- Asphalt Provides Durability
The whole reason you may be resurfacing in the first place, is surface flaking from improper mix or installation. Concrete has it, asphalt don’t!
- Asphalt Means Less Maintenance Cost
While asphalt won’t flake, it may start to have lineal cracking. When that happens it is easy to stay on top of, and cheap too.
- Easy, Cheaper to Install
From start to finish, asphalt driveways can be laid in a couple of days while concrete will take twice as long to lay and even longer to actually settle.
There ya have it! Those are the basic steps in resurfacing your concrete driveway! And some of the number of benefits of asphalt as opposed to concrete which we have discussed before, and maybe will revisit again.
Hope that has helped you get your home in order, but if you’re looking to make a change from concrete and leap to asphalt, join us in the world of asphalt here at Sunrise Asphalt. We’re happy to get your driveway brand spankin’ new.


